Thursday, March 26, 2009

Easter Preview: Lemon Torte

So, this isn't really an Easter preview. It would no doubt be lovely for Easter and is springy and so lemony and light—but in my family, Easter is definitely a pie occasion. But I have been waiting and waiting for the first signs of spring to make this cake again so that I can share it with you all! (All two of you!)

I made this cake last April at a Sur La Table "Easy Italian Cooking Class" with my friend Margaret at Pentagon Row. The menu was so delicious: Crostini al Pomodoro; Onion, Chickpea, and Prosciutto Frittata; the surprisingly amazing Fennel, Arugula, and Orange Salad; Zucchini Ribbons; and finally, Lemon Torte. I recreated most of it last Mother's Day, but making my mom a lemon cake instead of a chocolate pie would be laughable!

What got me most excited is that in our usual morning-light-only kitchen, I got the first rays of all-day spring sunlight! These pictures are so much better than usual. Thanks, sunshine!
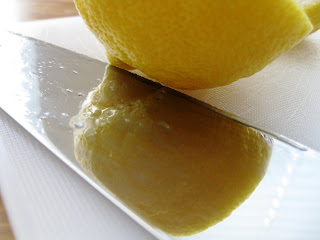
Lemon Torte
Easy Italian Brunch with Robyn Webb

1/2 c. (1 stick) unsalted butter, cut into chunks (save the wrapper to butter the pan!)
1 1/4 c. sugar
2 eggs
4 egg whites
1 c. nonfat lemon yogurt (you'll need slightly more than one container of yogurt)
grated zest and juice of one lemon
1 T. vanilla extract
2 1/4 c. cake flour
1 t. baking powder
1/2 t. baking soda
1/4 t. cream of tartar
pinch of salt
1/4 c. powdered sugar

Butter and lightly flour a 9-inch round nonstick cake pan. Preheat oven to 325 degrees.

In a medium bowl with an electric mixer, beat the butter to a cream and add the sugar, a little at a time, beating constantly. Add the eggs and egg whites, one at a time, beating after each addition. Add the yogurt and beat it in; then beat the lemon zest and lemon juice and vanilla.

In a separate bowl, combine the flour, baking powder, baking soda, cream of tartar, and salt. Gently fold the flour mixture into the egg mixture until no traces of white remain. Pour the batter into the prepared pan. Bake 1 hour (mine took 50 minutes).

Remove the cake from the oven and let cool completely. When cool, remove from pan* and sprinkle with powdered sugar.

*Tip: I've never really had much issue with getting cakes out of pans, but this one didn't cooperate. I found a great tip online that really helped. If, when completely cool, it still won't budge even after running a knife around the edge and gently shaking the pan upside down, heat a burner on your stovetop and put the cake pan over the flame for about 10 seconds. Turn upside down over your plate and repeat the gentle shaking. If this still doesn't work, flip the cake pan back over, and put the bottom of the cake pan on the heat for another 10 seconds. The cake should release (mine did!) after several rotations of this.

Spring!

Thursday, March 19, 2009

St. Patty's Day: Triple Mint Chocolate Cupcakes

It seems like I can't make enough cupcakes these days, and I can't really explain it. But for St. Patty's this year, I wanted something green and minty and decided to browse my old, old 1001 Chocolate Treats cookbook. My friend David gave me this book for my 16th birthday, and I'm ashamed to admit that besides staring at picture after picture (I think every recipe has one), I haven't made ANYTHING in this cookbook! How absurd is that? But it proves that even at Sweet 16, my friends very much knew what I'd like for a birthday gift—even if David never did ask me to the Prom. *sigh* But I'm still that same chocolate girl. :)

So, old pal, I promise to do more than stare at your pictures from now on. Wouldn't you?

Triple Mint Chocolate Cupcakes
based on #129, Chocolate Mint Cake

Cake:
1 c. all-purpose flour
1/3 c. cocoa powder
1 t. baking powder
1/4 t. baking soda
1/2 t. salt
3/4 c. sugar
1/3 c. vegetable shortening
1 egg
1 t. peppermint extract or peppermint schnapps
2/3 c. milk
Chocolate-covered mint candies

Frosting:
2 c. powdered sugar
2 T. unsalted butter, at room temperature
1/4 t. peppermint extract or peppermint schnapps
2 to 3 T. milk
1 to 2 drops green food coloring (I needed more!)
Chocolate-covered mint candies

Preheat oven to 350 degrees. Line 24 cupcake cups with paper liners.

For the cake:
Combine flour, cocoa powder, baking powder, baking soda, and salt in a bowl.

In a large bowl, using an electric mixer on medium speed, beat the sugar and shortening until smooth. Beat in the egg and peppermint extract/schnapps. In three additions, mix in the dry ingredients, alternating with the milk, beginning and ending with the dry ingredients. Divide evenly among prepared cupcake liners. Gently push one chocolate-covered mint candy into each filled cupcake liner, and gently cover with excess batter so that it is completely hidden.

Bake for about 20–22 minutes until a toothpick inserted into the center of a cupcake comes out clean or with moist crumbs attached. Cool completely before frosting.

For the frosting:
In a large bowl, using an electric mixer on medium speed, beat the powdered sugar, butter, and peppermint extract/schnapps until combined. Mix in enough milk to make it spreadable. Beat in the food coloring. (Note: I needed to make a second batch of frosting for 24 cupcakes.) When cupcakes have cooled completely, frost each cupcake and place one chocolate-covered mint candy on top.

Green with envy?

St. Patty's Day: Chocolate Chip Irish Soda Bread

Soooo, the Irish would totally strike me down for this next one because (1) the original recipe calls for raisins and caraway seeds and (2) chocolate chips? Seriously? But this isn't a raisin blog and I don't know anyone who would drool over that. Also, I hear that a soda bread with stuff in it is actually Spotted Dog. Who knew?

I love Irish soda bread, and traditionally, it's just four ingredients: flour, buttermilk, baking soda, and salt. This recipe also has sugar and butter and a few other nontraditional elements. It was good, but really didn't taste like soda bread to me. Chocolate chip bread, yes. (Not that that's an entirely bad thing either.) Also contributing to this: swapping 1 cup of whole wheat pastry flour for 1 regular because oh. my. gosh. it needs to vacate my cabinet! So if you follow the recipe, yours might taste more like Irish soda bread. Or, try one of these recipes next time. And add chocolate chips. ;)

Chocolate Chip Irish Soda Bread
4 c. all-purpose flour
1/4 c. sugar
1 t. salt
2 t. baking powder
4 T. unsalted butter, cold
2 c. chocolate chips
1 1/2 scant cups buttermilk*
1 egg
1 t. baking soda

*No buttermilk on hand? For each cup of buttermilk, mix one tablespoon of lemon juice or white vinegar with enough milk to make one cup. Let it stand for 5 minutes.

Heat oven to 350 degrees. Line a baking sheet with parchment paper or a Silpat (hmmm, did the Irish use Silpats?); set aside. In a large bowl, whisk together flour, sugar, salt, and baking powder until well combined.

Using a pastry cutter or two knives in scissor fashion, cut in butter until the mixture feels like coarse meal. Stir in chocolate chips until evenly distributed.

In a small bowl, whisk together buttermilk, egg, and baking soda until well combined. Pour buttermilk mixture into the flour-and-butter mixture all at once, and stir with a fork until all the liquid is absorbed and the mixture begins to hold together. It should resemble a rough biscuit dough. Using your hands, press the dough into a round, dome-shaped loaf about 8 inches in diameter. Lift the loaf from the bowl, and transfer it to the prepared baking sheet.

(If desired, brush with an egg wash to make it shiny on top.) With a sharp knife, cut a cross, about 1/2 inch deep into the top of the loaf. Transfer to the oven. Bake, rotating halfway through, until it is deep golden brown and a toothpick comes out clean when inserted into the center, about 70 minutes (mine cooked in about 60). Remove from oven, and transfer bread from the baking sheet to a wire rack to cool.

Happy St. Patty's Day!

Sunday, February 15, 2009

Valentine's Day: Chocolate Soufflés

The hubz and I rarely go out for Valentine's Day. A nice meal at home is what makes us happy! So to top off this year's delish dinner, I made a rich dark chocolate soufflé. It's the perfect decadent treat: rich, light, molten, airy. I just love it!

This particular soufflé has the added hint of rum (we used honeymoon rum!) but any other liqueur would be great too: Bailey's, Kahlua, Godiva—get creative!


Chocolate Soufflés

10 oz. bittersweet or semisweet chocolate, finely chopped – plus a small piece for the center of each soufflé
3/4 c. heavy whipping cream
5 T. sugar
2 T. (1/4 stick) unsalted butter – keep the wrapper for buttering the ramekins
1 T. dark rum
1 T. vanilla extract
1/4 t. salt

6 large eggs, separated
Pinch of cream of tartar
Powdered sugar for garnish

Combine first 7 ingredients in heavy medium saucepan. Stir over low heat until chocolate melts and mixture is smooth. Remove from heat; cool to lukewarm. (Chocolate base can be made 1 day ahead. Cover; chill. Stir over low heat just until lukewarm before continuing.)

Preheat oven to 350°F. Butter eight 3/4-cup ramekins or custard cups and coat insides with sugar. Whisk egg yolks into lukewarm chocolate base. Using electric mixer, beat egg whites and cream of tartar in large bowl until soft peaks form. Fold whites into chocolate base in 3 additions. Divide soufflé mixture among prepared ramekins; place on baking sheet. If desired, place a small piece of leftover bittersweet chocolate into the middle of each soufflé. Bake soufflés until puffed but still moist in center, about 15 minutes. Sift powdered sugar over soufflés, if desired, and serve immediately.


Happy Valentine's Day!!!

Valentine's Day: Palmiers

M's favorite cookies are buttery palmiers, also called elephant ears. I always wanted to make them for him, and decided that since they are heart shaped, Valentine's Day would be the perfect opportunity to do so.

I used Ina Garten's recipe for these, but I would not use quite as much sugar as she does. I found that most of it will not become absorbed into the pastry dough and you're left with so much extra on the mat that it's not really worth the waste. My only other tip is to defrost the puffed pastry for at least an hour. Otherwise, the folds will just rip and you really need a full sheet for each cookie.

Palmiers
2 c. granulated sugar (I used 1.5 c. and still had so much left over...)
1/8 t. salt
2 sheets puff pastry, defrosted (recommended: Pepperidge Farm)

Preheat the oven to 450 degrees F.

Combine the sugar and kosher salt in a bowl. Pour 1 cup of the sugar/salt mixture on a flat surface such as wooden board, silicone baking mat, or marble. Unfold one sheet of puff pastry onto the sugar and pour another 1/2 cup of the sugar mixture on top, spreading it evenly on the puff pastry. This is not about sprinkling, it's about an even covering of sugar. With a rolling pin, roll the dough until it's 13 by 13-inches square and the sugar is pressed into the puff pastry on top and bottom. Fold the sides of the square towards the center so they go halfway to the middle. Fold them again so the two folds meet exactly at the middle of the dough. Then fold one half over the other half as though closing a book.

Slice the dough into 3/8-inch slices and place the slices, cut side up, on baking sheets lined with parchment paper or a Silpat. Place the second sheet of pastry on the sugared board, sprinkle with the remaining 1/2 cup of sugar mixture, and continue as above. (There will be quite a bit of sugar left over on the board.) Slice and arrange on baking sheets lined with parchment or a Silpat.

Bake the cookies for 6 minutes until caramelized and brown on the bottom, then turn with a spatula and bake another 3 to 5 minutes, until caramelized on the other side. Transfer to a baking rack to cool (or devour them when they're warm and still doughy!).

Happy Valentine's Day!

Sunday, February 1, 2009

Cardinal Red Velvet Cupcakes with Cream Cheese Frosting

The hubz is an AZ native. To say he likes Arizona sports is a wee bit of an understatement. Suns, D-backs, Coyotes, Sun Devils... and of course, the Cardinals! So when the Cards finally made it to the Super Bowl, it was time to pull out all the stops. From cactus-shaped sugar cookies to guacamole and seven-layer dip, we had a very superstitious Southwest-inspired meal—and Cards-colored red velvet cupcakes!

I never really understood the big deal behind red velvet cupcakes. They're vanilla? But red? But contain cocoa? Huh? But since I LOVE cream cheese frosting, I decided to make these, and I can successfully say that I will make them again soon. This particular recipe produced the most MOIST cupcakes I have ever made. I usually think red food coloring tastes very bitter—red M&Ms, red frosting flowers on a cake (*gag*)—but this just tasted like a moist cake, no bitterness at all.

I combined two different Food Network recipes here because I saw the episode where Sunny made the cakes, which inspired me, but I prefer a cream cheese frosting to a basic white one. And, why not just make Paula Deen's recipe since it has the frosting I like? That's easy: Sunny's contained more cocoa. :) To make them more Big Game–friendly, I made Sunny's recipe into cupcakes and cut the baking time accordingly.

*IMPORTANT: If you don't want everything to be permanently stained red, use a stainless steel bowl, stainless steel whisk, and a dark colored (not white) spatula with a plastic handle (a wooden handle would probably turn red immediately if any dye got on it!)

Red Velvet Cupcakes with Cream Cheese Frosting
2 sticks butter, room temperature (I used unsalted)
1 1/2 c. sugar
2 oz. red food coloring (I only used about 1.5 oz.)
3 T. cocoa powder
Pinch salt
2 eggs
1 c. buttermilk
1 t. vinegar
1 t. vanilla extract
2 1/2 c. all-purpose flour
1 1/2 t. baking soda

Cream Cheese Frosting:
1 pound cream cheese, softened
2 sticks butter, softened (I used unsalted)
1 t. vanilla extract
4 c. sifted confectioners' sugar

Preheat oven to 350 degrees F. Line 2 (12-cup) muffin pans with cupcake papers.

In a stand mixer fitted with the paddle attachment, cream butter and sugar, until light and fluffy. Meanwhile, in a small bowl, make a paste out of the red food coloring, cocoa, and salt using a whisk. Remove bowl from stand mixer and mix in paste by hand to the creamed butter. In a measuring cup, stir eggs with buttermilk and add to batter. Mix in vinegar and vanilla, and then add flour and baking soda. Mix until combined but do not overmix.

Divide the batter evenly among cupcake cups, filling about 2/3 full. Bake in oven for about 20 to 22 minutes, turning the pans once, halfway through. Test the cupcakes with a toothpick for doneness. Remove from oven and cool completely before frosting.

For the frosting:
In a large mixing bowl, beat the cream cheese, butter, and vanilla together until smooth. Add the sugar and on low speed, beat until incorporated. Increase the speed to high and mix until very light and fluffy. Frost cooled cupcakes and get back to watch the heartbreaker game!!


At least we enjoyed the cupcakes, if not the final score. :(

Sunday, January 25, 2009

Cowboy Cookies

My mom always makes a big batch of various chocolatey cookies for M and me at the holidays. This year's stash included chocolate chocolate chip peanut butter cookies, heath bar cookies, Oreo truffles, Saltine "bark," and these curious Cowboy Cookies. Considering that I love "stuff" in my cookies and "stuff" in my ice cream, I knew immediately that I'd love these. With oats, chocolate chips, pecans, and coconut, it really has something for everyone (except perhaps my dad, who abhors coconut... sorry, dad!). Additionally, these are a chewy cookie, for those of us (me! me!) who'd rather have that than a crunchy cookie any day of the week. Another big win for Martha!

Cowboy Cookies
2 c. all-purpose flour
1 t. baking soda
1 t. salt
1/2 t. baking powder
2 sticks unsalted butter, softened
3/4 c. granulated sugar
3/4 c. brown sugar
2 large eggs
1 t. vanilla extract
1 1/2 c. old-fashioned oats (I used quick oats and the world didn't stop spinning)
6 oz. (1 c.) semisweet chocolate, cut into 1/4-inch chunks (I used chocolate chips)
3 oz. (3/4 c.) pecan halves (I chopped them)
1/2 c. shredded unsweetened coconut (unsweetened is hard to find other than at Whole Foods)

Preheat oven to 350 degrees. Coat baking sheets with cooking spray, line with parchment, and spray parchment (or just use a Silpat). Sift flour, baking soda, salt, and baking powder into a medium bowl; set aside.

Beat butter and sugars with a mixer on medium-high until pale and creamy, about 3 minutes. Reduce speed to medium. Add eggs, 1 at a time, beating well after each addition. Beat in vanilla.

Reduce speed to low, and slowly add flour mixture, beating until just incorporated. Beat in oats, chocolate, pecans, and coconut until combined.

Using a 1 1/2-inch ice cream scoop or a small spoon, drop dough onto baking sheets, spacing 2 inches apart.

Bake until edges of cookies begin to brown, 11 to 13 minutes. Transfer baking sheets to wire rack, and let cool for 5 minutes. Transfer cookies to racks. Let cool. (inkpadchocolate says: "Eat when still hot!)

I love these salty/sweet/chewy bites of heaven!

Thursday, January 22, 2009

Scouty's First Birthday!: Devil Dog Cake

I apparently grew up in the wrong part of the country to know what Devil Dogs are, but they are little chocolate cakes with marshmallow filling made by Drake's out of New Jersey.

I also didn't realize just how many people out there on the Web are obsessed with them.

In any case, we threw a little party for Scout's first birthday, and for the human cake (the dogs got a dog-friendly cake), there's really no better tribute to our naughty little pup than something called a devil dog!

Because I was short on time, I just used Duncan Hines devil's food cake mix from the box, but any of the recipes above would make a great base for the chocolate cake. I ended up using the epicurious recipe for the marshmallow frosting (it's the same as on smitten kitchen). If you like a super sweet frosting, this one's for you.

Devil Dog Cake
1 box Duncan Hines devil's food cake mix (prepared according to box)

Marshmallow (or seven-minute) Frosting:
2 large egg whites
1/2 c. sugar
1/4 c. light corn syrup
2 T. water
1 t. vanilla extract

Make cake according to package directions (I made it with two round pans).

For the frosting, combine frosting ingredients with a pinch of salt in a metal bowl set over a saucepan of simmering water and beat with a handheld electric mixer at high speed until frosting is thick and fluffy, 6 to 7 minutes. Remove bowl from heat and continue to beat until slightly cooled. When cake is cool, frost. I suppose that for a *true* Devil Dog, you should only frost between the layers to make it look like the Drake's cake, but I wanted it to look more like a traditional birthday cake.


(Tip: This frosting was GREAT for piping details. It's thick and glossy and doesn't run—although the dye colors do run a little bit. I reserved about a 1/2 cup of frosting that I put in different ramekins and dyed before piping.)


Yes, I am aware that I went to this much trouble for a dog. But this cake was for the humans!

What you mean? Dis no chocolate cake!
(Yes, that is a Pound Puppy birthday hat. Don't judge.)

Happy first birthday, fuzzy guy!

Sunday, January 4, 2009

New Year's Eve: White Chocolate Mousse Cups

I wanted to make a unique and bite-sized dessert for an at-home New Year's Eve with my best friend and her fiance. Since I consider Giada the queen of the kitchen, and she shares my chocolate obsession, I decided on her Mascarpone and Dark Chocolate Cream in White Chocolate Cups recipe. I'm not usually a white chocolate fan—it's not chocolate—but I'm a sucker for cute packaging.

It's actually not as labor-intensive as it may seem, but it does take a little bit of time, especially during the freezing process. Don't leave this one for the last minute. The best tip I have is that, when peeling away the paper liner from the white chocolate, start at the bottom of the paper muffin liner since there's a little air pocket there that you can gently stab with a knife tip. And, while a piping bag isn't necessary, it makes the presentation nicer. (Even though I had a star tip that was too small, it still looked nice, I think!) Finally, Giada calls for regular muffin cups (makes 8) but I thought the mini muffin cups were cuter and more figure friendly after an evening of noshing on junk. :)

White Chocolate Mousse Cups
8 oz. white chocolate, chopped
4 oz. bittersweet or semisweet chocolate, chopped
1 c. whipping cream
3 T. sugar
8 oz. mascarpone cheese
1 teaspoon grated orange peel (I omitted; I hate orange with chocolate)
1/4 t. vanilla extract

Have mini muffin cups ready. Melt the white chocolate in top of double boiler over simmering water (or use a good pot), stirring until smooth. Spoon approximately 1 tablespoon melted chocolate into each paper liner. Using a pastry brush, coat the chocolate evenly and completely over the bottom and up the sides of the liners. Freeze until the chocolate is firm, about 30 minutes. Remelt the remaining white chocolate. Spoon 1 tablespoon into each cup and brush over the bottom and up the sides, forming a second coat. Freeze until completely set, about 1 hour.

Melt the bittersweet chocolate in top of a clean double boiler over simmering water, stirring until smooth. At this point, set aside to cool completely.

Using an electric mixer, beat the cream and sugar in a large bowl until soft peaks form. Set the whipped cream aside.

Using an electric mixer, beat the mascarpone cheese, melted bittersweet chocolate, orange peel (if using), and vanilla in a large bowl just until smooth and glossy, about 30 seconds (do not overmix). Fold the whipped cream into the chocolate mixture in 2 batches. Transfer the mousse to a pastry bag fitted with a star tip. Pipe the mousse into the white chocolate cups. Serve immediately, or cover and refrigerate overnight, and then let stand at room temperature 1 hour before serving.

I should have garnished it with chocolate curls, but I waited until the last minute. :)

Happy New Year!

Sunday, December 28, 2008

Happy Holidays!!

From my kitchen to yours, Happy Holidays!!

May your holidays be fun...

and golden...

and steeped in tradition*...

and snow-capped...

and drunken...

and perfect.


*Kiss up to Miss ieatdc in order to get her grandmother's mandel bread recipe. :)
Related Posts with Thumbnails